Dropping Map Pins
Pins are a visual indicator of a location and its coordinates. You can drop a pin in two ways: by right-clicking on the map, or by entering coordinates with the Map Pins tool. You can view a list of your dropped pins using the Map Pins tool. Pins do not persist to your next session.
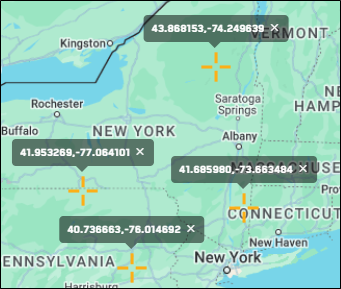
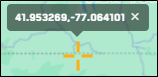
Dropped pins in the viewport.
Adding a Map Pin Using Coordinates
You can use coordinates to add a map pin to a specific location.
-
 .
. -
In the Coordinate field, enter the coordinates that you want to pin.
Copy the coordinates from any location and paste them into the Coordinate field.
See Copying Coordinates.
The Map Pins tool supports all coordinate formats. When you paste coordinates in the Map Pins tool, they display in the tool and in the viewport as a lat/long pair.
In this example, we added a new map pin using MGRS coordinates. In the viewport and the Map Pins tool, these coordinates display as a lat/long pair.
-
Select Add Map Pin. Your new pin is added to the list of current map pins, and crosshairs indicate the pin's coordinates on the map.
The following coordinates are automatically added to the Coordinates field:
-
Searched locations
-
The center of the viewport as you pan the map
Select Add Map Pin to quickly add these coordinates to the list of map pins.
Adding a Map Pin from the Viewport
If you want to add a pin on-the-fly, you can right-click anywhere in the viewport to add a pin to that location.
-
Right-click the location that you want to pin.
-
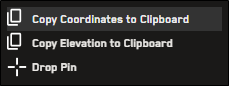
From the context menu, select Drop Pin. Crosshairs indicate your pin on the map.
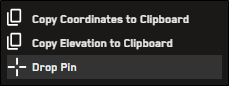
Your pin is also added to the list of map pins. Even though you did not create the pin using specific coordinates, the coordinates appear in the list of pins.
To see your map pins, select Map Pins
.
Adding a Map Pin Using Search
You can also add a map pin by searching for a location using its coordinates.
-
Using the Search bar, search for any location using its coordinates.
A pin automatically displays at that location and is added to the list of map pins.
Viewing Map Pins
-
Select Map Pins
 . The list of map pins displays.
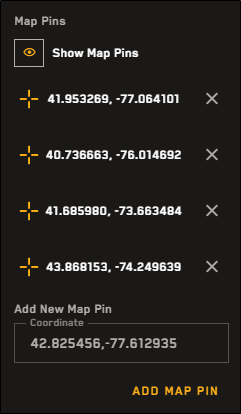
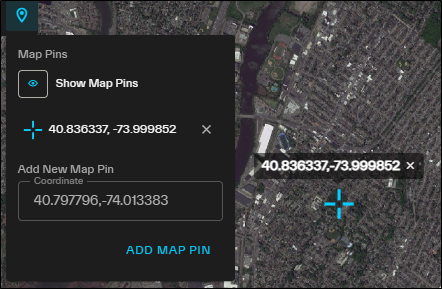
A list of map pins in the Map Pins tool.
Map pins are visible by default. If you want to hide all map pins, select the Show Map Pins visibility icon.
|
|
|
|
|
|