Adding Layers
Add OGC-compliant layers from Web Services to view imagery and vector data in the viewport.
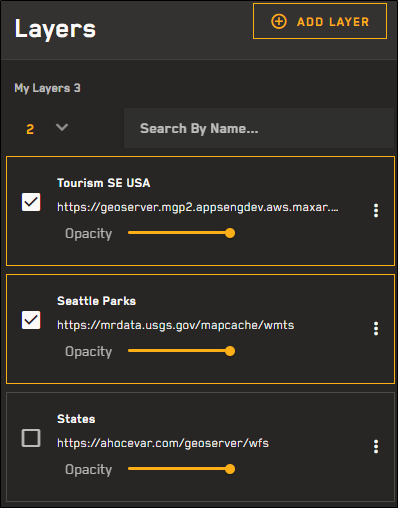
The Layers panel with several custom layers added.
-
Select Layers. The Layers panel opens.
-
Select Add Layer. The Add New Layer panel opens.
-
From the GIS Web Service Type drop-down, select the type of endpoint you want to add. The following endpoints are available:
-
Image Service Endpoint URL
-
Map Service (ESRI) Endpoint URL
-
WFS Endpoint URL
-
WMS Endpoint URL
-
WMTS Endpoint URL
-
GeoJSON Upload
At this time, Hub supports public endpoints.
-
-
Do one of the following, depending on the type of layer you are uploading.
 Upload a GeoJSON Layer
-
To select the file you want to import, do one of the following:
-
Drag and drop a GeoJSON file from your computer into the dotted area.
-
Select Select from Computer. In the dialog that opens, locate the GeoJSON file you want to import, then select Open.
The file uploads.
-
Upload Another Type of Layer
-
In the Service Web Address (URL) field, enter the URL for your layer.
-
Select List Layers. When a successful connection occurs, the Available Third-Party Layers drop-down list displays.
-
From the Available Third-Party Layers drop-down, select the third-party layer(s) you want to add to your custom layer.
If you select multiple third-party layers at the same time, they are added as a single custom layer in Hub. If you want to manage each layer separately (e.g., control each layer's opacity separately, delete layers individually), you should add them one at a time.
-
In the Name field, enter a name for the layer.
-
(Optional) In the Description field, enter a description for the layer.
-
-
Select Add Layer. The custom layer is added to the Layers panel. Select the layer to turn it on. See Viewing Layers.
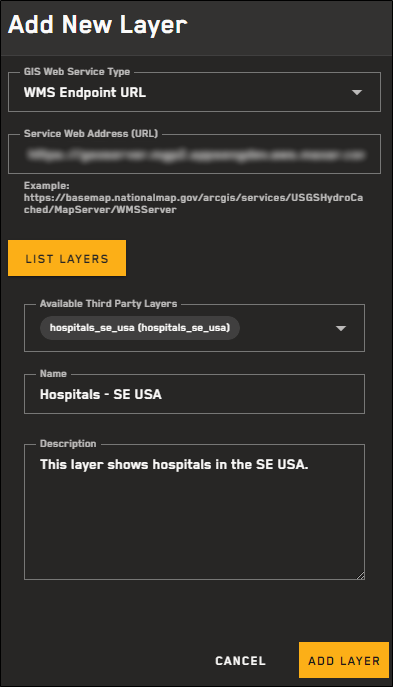
The Add New Layers panel with a third-party layer added.
At this time, Hub only supports layers with the EPSG:3857 projection. If you select a service that contains layers with an incompatible projection, data from that layer may not display, or may display incorrectly.
When adding a supplemental layer, Hub attempts to securely transmit information to and from the third-party server using Cross-Origin Resource Sharing (CORS). CORS is a mechanism that allows secure, cross-site data transfers. If the third-party server does not allow access from Vantor domains (or if CORS fails for any other reason), the layer cannot be viewed from within Hub.