Commenting on Projects
When you work with a project you can create comments to record details about the project. Comments also allow you to communicate with colleagues who need to view project imagery without having to leave the Hub interface.
Adding a New Comment Thread
To start working with comments, create a new comment thread. Comment threads are tied to a specific area of interest (AOI).
- Select Projects. The Projects panel opens.
-
Next to the project you want to comment on, select Open. The expanded Projects interface opens.
-
Expand the Comments section.
-
To add a new comments thread, select Create New Comment Thread
 . The Areas toolbar displays at the top of the viewport.
 -
Do one of the following, depending on the type of area you want to use for the comment thread.
 Draw a Point
Draw an area using a point.
-
Select Draw Area > Draw a Point.
-
In the viewport, select the location where you want to place your comment. The cursor changes to an arrow with a trailing blue dot
 to indicate that the drawing tool is active.
Draw an Area Using a Polygon
Draw an area of interest using a polygon.
-
Select Draw a Polygon. The cursor changes to an arrow with a trailing blue dot
to indicate that the drawing tool is active. -
On the map, select a starting point, then select at least two additional vertices.
As you draw the polygon, a callout indicates the length of each segment.
After you have selected at least three vertices, a callout indicates the potential area of the polygon if you were to close it.
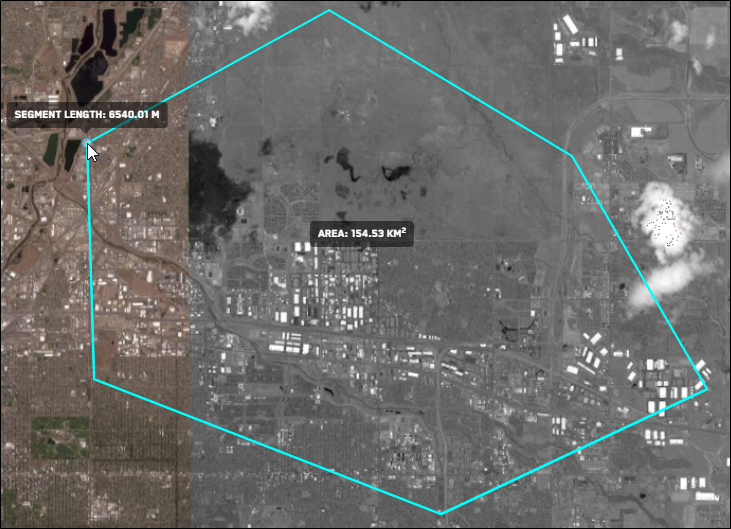
Current area of the polygon.
-
To close the polygon, do one of the following:
-
Manually Close the Polygon Manually connect your last vertex to the starting point, closing the polygon. When your cursor is close to the starting point, Hub will snap the cursor to the starting point so there are no gaps in the polygon.
-
Automatically Close the Polygon Double-click anywhere on the map to automatically draw a straight line to the starting point, closing the polygon.
-
Draw an Area Using a Rectangle
Draw an area of interest using a rectangle.
-
Select Draw a Rectangle. The cursor changes to an arrow with a trailing blue dot
to indicate that the drawing tool is active. -
On the map, select a starting point, then drag to draw
A callout indicates the rectangle's area as you drag.
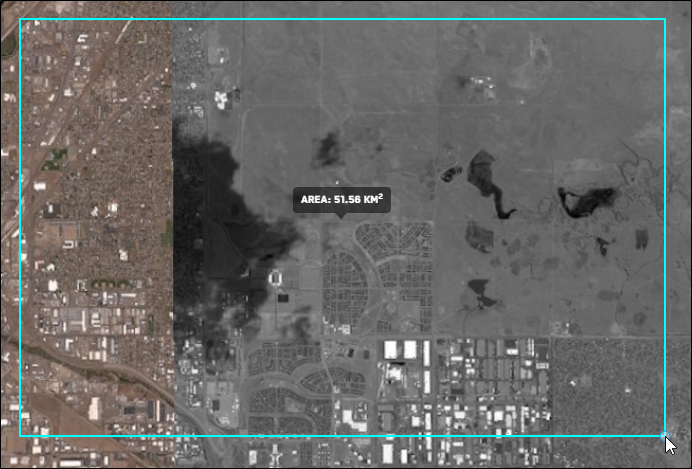
Current area of the rectangle.
-
(Optional) If you want to edit the area, select Edit Area. When you are finished editing the area, select Finish Editing Area. See Editing Areas.
-
-
(Optional) If you want to edit the area, select Edit Area. When you are finished editing the area, select Finish Editing Comment Thread. See Editing Areas.
-
On the toolbar, select Continue. The Create Comment Thread dialog opens.
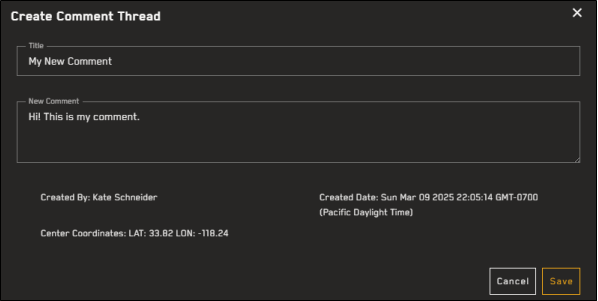
The Create Comment Thread dialog.
-
In the Title field, enter a name for the comment thread.
-
In the New Comment field, enter the comment you want to add.
-
Select Save. You new comment is added to the viewport and displays in the Comments section.
Using the Comment Menu
Use the Comment Menu ![]() to perform additional tasks on an existing comment.
to perform additional tasks on an existing comment.
-
Next to the comment you want to work with, select the Comment Menu
 .
. -
Select one of the following options:
Zoom To Comment AOI
Zooms the map in or out to the full extent of the comment's area of interest (based on the area drawn when the comment was created).
Add/View Comments
Select this option to add new comments to an existing comment thread. If the thread is locked, you can view all comments on the thread.
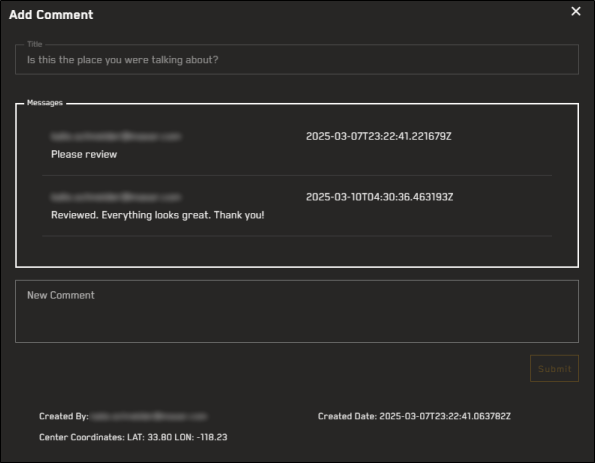
Add comments to a comment thread, or view existing comments.
-
Select Add/View Comments. If the thread is locked, select View Comments.
A dialog opens and displays all previous messages.
-
If the comment thread is still open, you can add a new message. In the New Comment field, enter a message, then select Submit.
Your comment displays in the Messages field.
-
To close the dialog, select Close
 .
.
Open/Close Thread
If you are the owner of a comment thread, you can close it to new comments. Alternatively, you can also re-open a closed thread to new comments.
-
Select Open/Close Thread. The thread's Locked status updates in the Comments section.
-
If a thread is closed, the Locked column displays true. If a thread is open, the Locked column displays false.
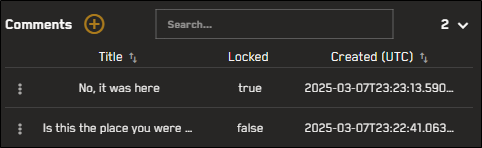
A closed comment thread and an open comment thread.
-
-
Searching Comments
To search available comments, enter a keyword in the Search field . The Comments section automatically filters as you type.