Managing Project Imagery
Manage project imagery to visualize your selected images, manually select new images, remove images that don't meet your needs, and stack the images to best meet your project requirements. You can select project imagery immediately after creating it, or you can edit project imagery a project at any time.
You will manage project imagery in the expanded Projects interface using the cell selector and the Images section.
Selecting Cells
Project imagery is overlaid on arbitrary 1-degree cells (i.e., cells do not align to a coordinate grid). Cells make projects more manageable by allowing you to select and view imagery over a several smaller, labeled areas.
-
Select Projects. The Projects panel opens.
-
Next to the project you want to manage, select Open. The expanded Projects interface opens.
The cell selector displays at the top of the expanded Projects interface, along with details about the selected cell.
-
Cell Name The active cell's identifier.
-
Images Available A count of possible images for the current cell.
-
Images Selected A count of selected images for the current cell.
-
Coverage Calculates the fulfilled portion of the cell based on current image selections.

The cell selector and details about the active cell.
-
-
Use the cell selector to navigate your project.
-
The highlighted square indicates the current cell.
-
Image footprints for the current cell display in the viewport.
-
Hover over a cell to highlight it in the viewport.
-
Select a cell to zoom to it and make it active.
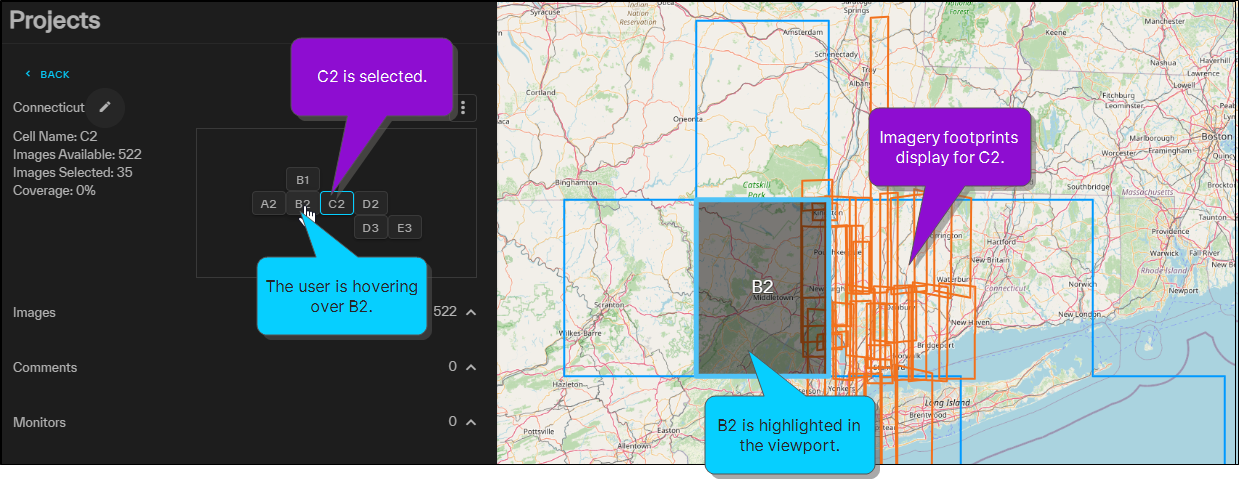
Use the cell selector to navigate your project.
-
Selecting Imagery
The Images section shows available imagery for the current cell. Make image selections from these available images. Project imagery is automatically selected to provide the best coverage for each cell. Select or remove imagery to best meet your needs.
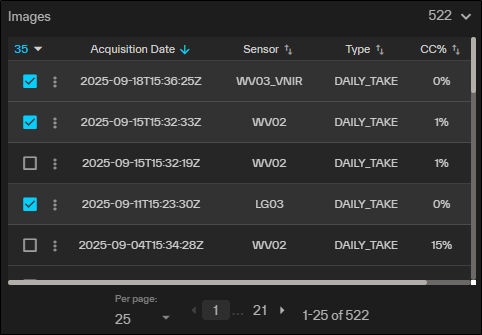
The Images section and selected project imagery.
-
In the expanded Projects interface, expand the Images section, then do any of the following:
-
Select Imagery Select the checkbox next to the image(s) you want to add to the project. You can also select anywhere in the image's row.
-
Remove a Single Image Clear the checkbox next to the image you want to remove from the project.
-
Remove All Images on the Page Select the With Selected menu
 , then select Deselect All. This only removes images on the current page of selections; use the pagination options to change how many images that display on each page, or to navigate between pages of images
Deselect All is available if two or more images are selected.
-
Filtering Imagery
You can apply filters to the imagery that displays in your project. For more information about filtering imagery, see Filtering Imagery.
Using the Image Menu
In the Images section, select the Image Menu ![]() to perform additional tasks with project imagery.
to perform additional tasks with project imagery.
-
Next to the image you want to work with, select the Image Menu
 .
. -
Select one of the following options:
 View Metadata
View detailed information about an image (e.g., image ID, acquisition date and time, sensor, cloud cover, GSD, ONA).
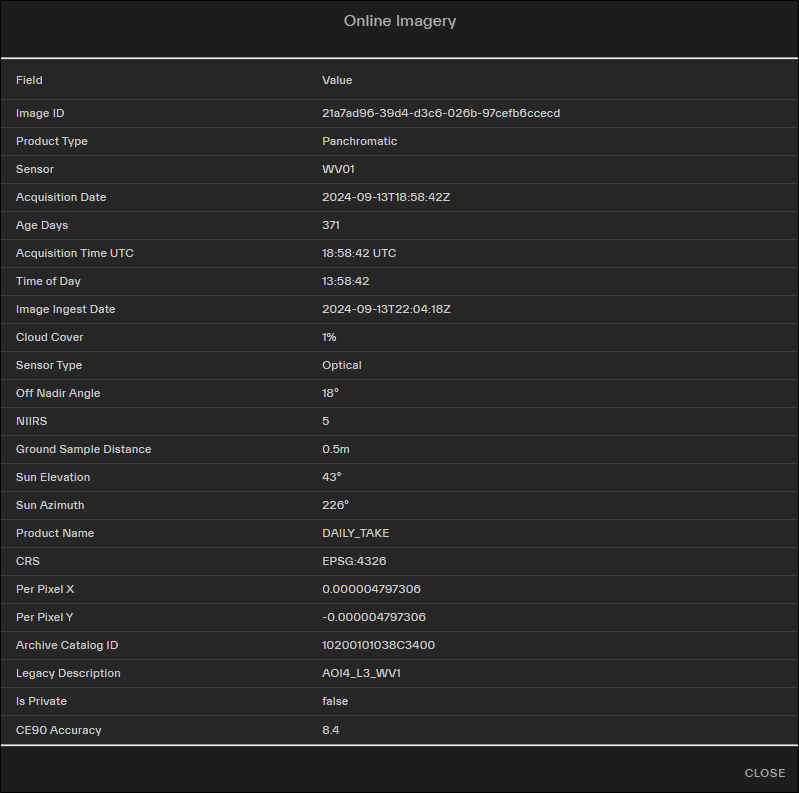
An example of image metadata for online imagery.
Zoom To Extent
Zooms the map in or out so the full image strip is centered in the viewport.
Move Image to Top
Move an image to the top of the Images section. Unlike dragging and dropping imagery, which only lets you move imagery within the same page of results, Move Image to Top can move imagery from any page of the results to the top of the stack.
You can also manually drag and drop an image within the imagery results to place it anywhere within the stack.