Filtering Imagery
Filters allow you to narrow down the imagery that appears in the Imagery panel, so you will see the imagery that is most relevant to you.
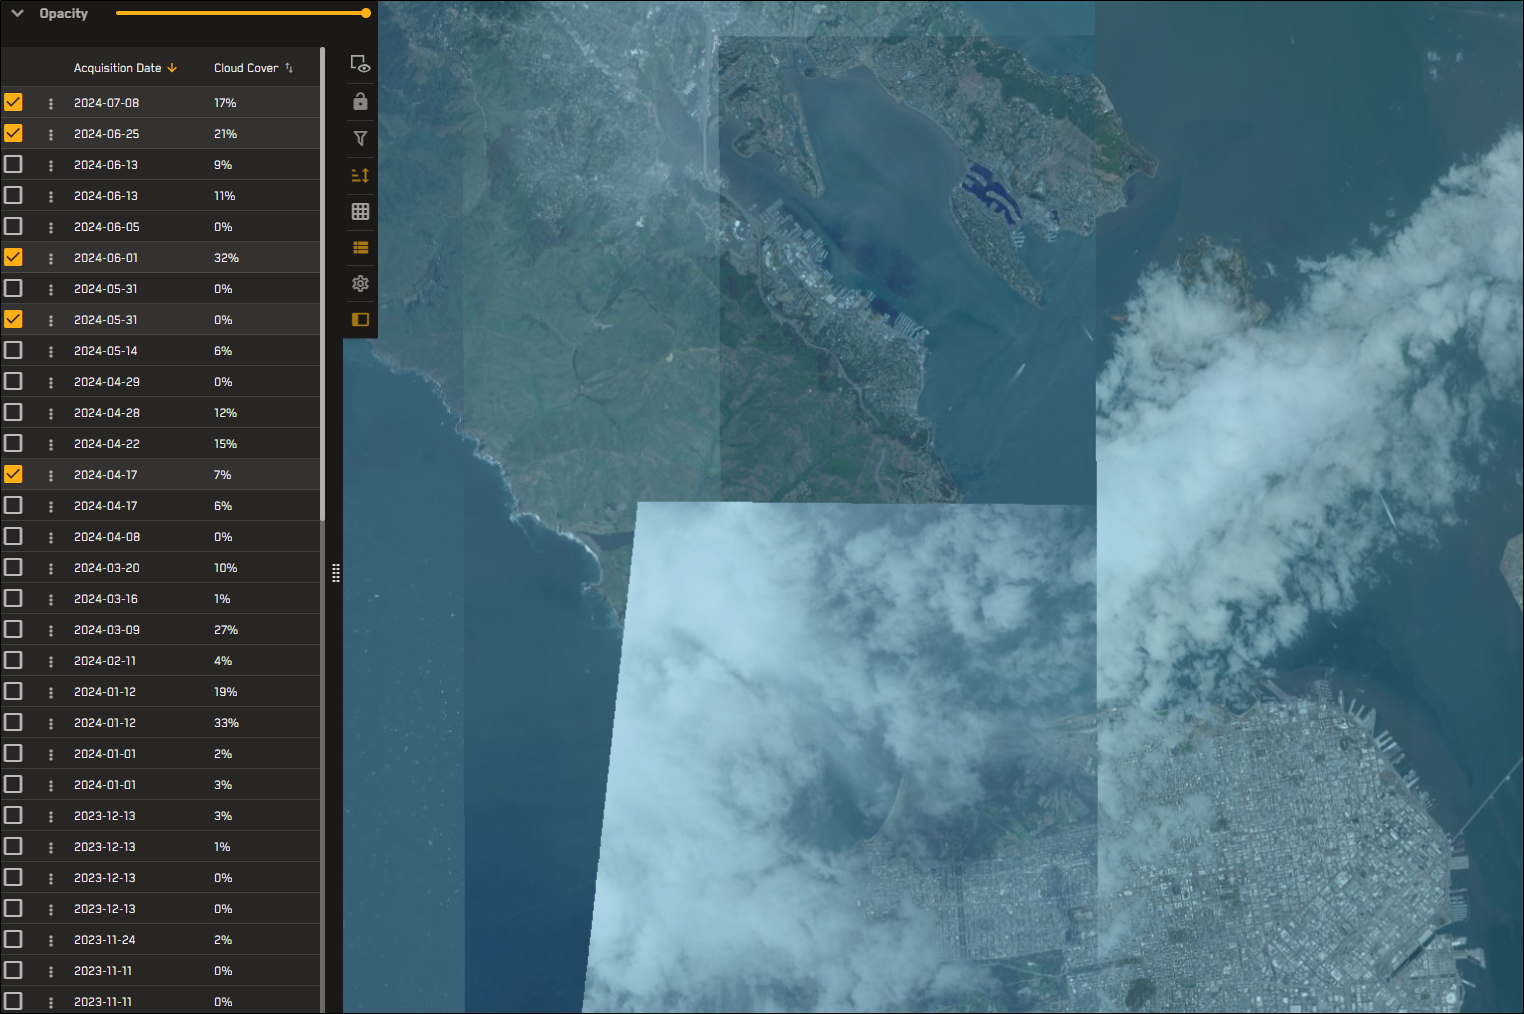
By default, the auto-selected imagery over San Francisco, California has relatively high cloud-cover, so the viewport is obstructed in spots.
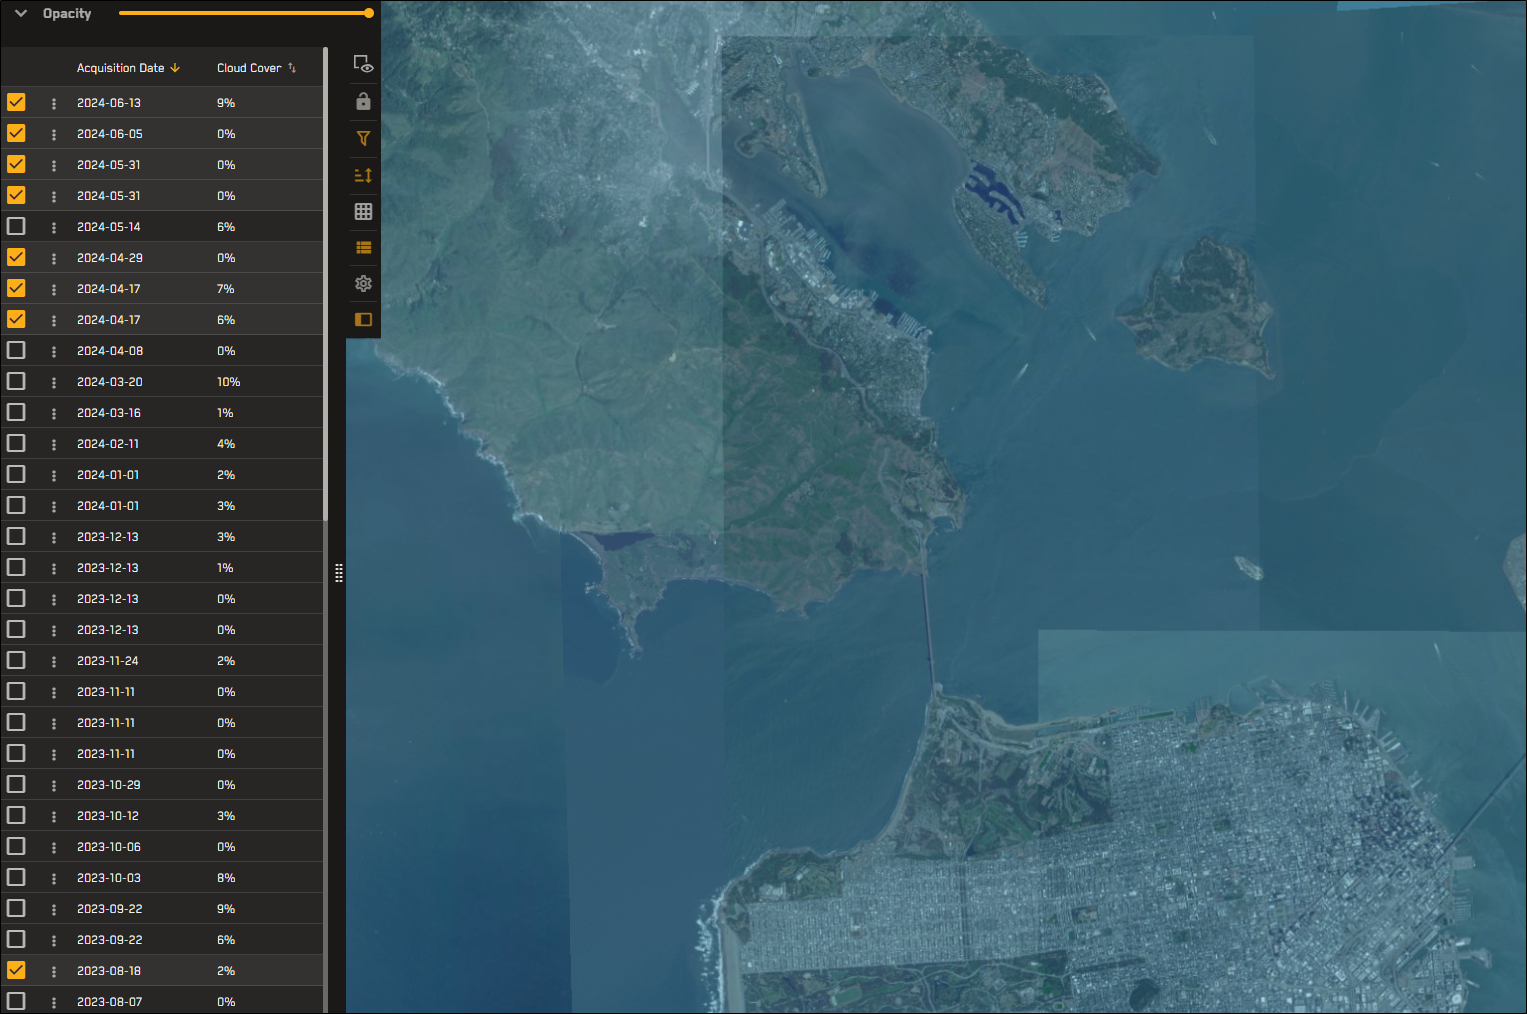
After applying a filter to limit cloud cover to 10%, you can easily see the city and surrounding areas.
- Select Imagery. The Imagery panel opens.
-
On the Imagery panel toolbar, select Filters
 . The Filters dialog opens.
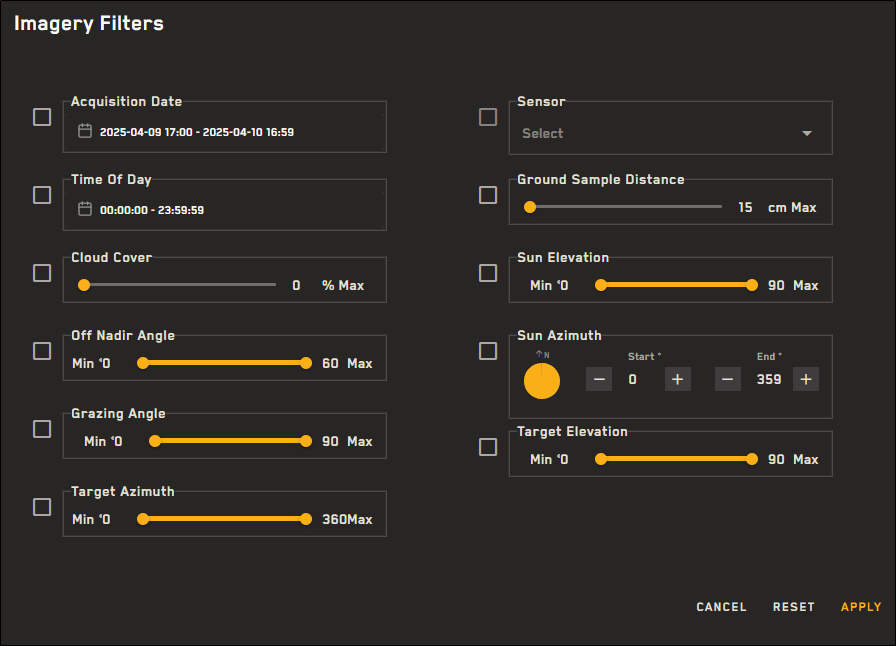
Imagery Filters dialog for online imagery.
Imagery Filters dialog for archive imagery.
-
Specify the parameters for each filter you want to apply.
 More Information
-
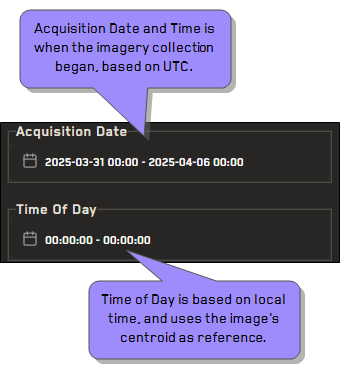
Acquisition Date In the fields, enter the start and end acquisition date and time (UTC), or use the calendar picker to select the start and end date and time.
-
Time of Day(24-hour format, local time) In the fields, enter the start and end time of day, or select the start and end times from the drop-downs. Time of Day uses the image’s centroid as the reference.
More Information: Acquisition Time vs. Time of Day
The determination for time of day is divided by the 25 nautical time zones, not administrative local time.
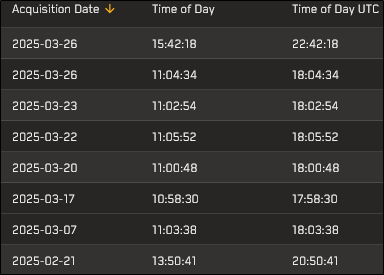
In this example, the Acquisition Date filter identifies imagery with a collection start time between 2025/03/01 and 2025/04/06, beginning at 00:00:00 UTC and ending at 00:00:00 UTC. The Time of Day filter also identifies imagery collected on those dates with a local time between 00:00:00 and 00:00:00.
The following image shows several image results from this filtered search. Notice the difference in the collected time (Time of Day UTC) and the local time (Time of Day) for each image.
-
Cloud Cover (0% – 99%) Use the slider to set the maximum cloud cover percentage.
-
Off Nadir Angle (0° – 60°) Use the double-ended slider to set the allowable range for the angle of the satellite in relation to its target.
-
Target Azimuth (0° – 360°; archive imagery only) Use the double-ended slider to set the allowable range of the azimuth of the target. Azimuth is measured from north in clockwise degrees.
-
NIIRS (0 – 9; online imagery only) Use the slider to set the minimum allowable NIIRS value.
-
Grazing Angle (0° – 90° ) Use the slider to set the allowable range for the angle between a local ground plane and a vector to the satellite at the scene center point, as projected onto an elevation-inflated ellipsoid.
-
Sensor From the drop-down, select the sensor(s) you want to use for imagery. Sensors are organized into the following groups:
-
Active Vantor electro-optical sensors (e.g., GE01, WV03_SWIR
-
Legacy Vantor electro-optical sensors (e.g.,
-
External electro-optical sensors (e.g., KS3, KS3A)
-
External radar sensors (e.g., KS5, RS2)
-
Umbra Sensors (e.g., UM04, UM05)
Not all sensors may be available to your account.
-
-
Ground Sample Distance (15 cm – 500 cm) Use the slider to set the maximum ground sample distance.
-
Sun Elevation (0° – 90°) Use the double-ended slider to set the allowable range, in degrees, of the sun elevation angle.
-
Product Name (Online imagery only) From the drop-down, select the product name(s) you want to locate in the catalog.
-
Product Type (online imagery only) From the drop-down, select the product type(s) you want to locate in the catalog. The following product types are available:
-
Sun Azimuth (0° – 359°) Use the pickers to set the allowable range for the sun's relative position along the horizon. Azimuth is measured from north in clockwise degrees.
The blue portion of the circle next to the range pickers indicates the selected azimuth.
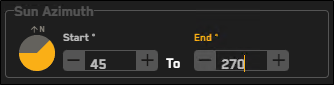
The blue portion of the circle indicates a sun azimuth between 65° and 290°.
-
Target Elevation (0° – 90°; archive imagery only) Use the double-ended slider to set the allowable range for the altitude, in degrees, of the target.
When you change a filter's default settings, the checkbox next to the filter's name is automatically selected. If you want to remove a filter, clear the checkbox next to the filter's name.
-
-
(Optional; online imagery only) If you only want to search for private imagery, select the checkbox next to Private Imagery.
-
To apply the filters, select Apply. To return the filters to their default settings, select Reset.
You can apply a maximum of six filters at the same time.
More About Filtering
-
The Filters icon has a different appearance when filters are applied, and when the Imagery panel is locked.
-
Filter settings are preserved when you lock the Imagery panel. You cannot change filter settings when the Imagery panel is locked.
-
If you switch between imagery catalogs while filters are applied, your current filter settings are preserved.
If a filter setting exists in the online imagery catalog, but does not exist in the archive imagery catalog (e.g., NIIRS), the online dataset remembers that filter when you switch back to the online imagery catalog.
When viewing online imagery, you apply the following filters:
-
Acquisition Date (applies to online and archive imagery)
-
NIIRS (applies to online imagery only)
When you switch to the archive imagery catalog, you will see the Acquisition Date filter in the Imagery Filters dialog. However, the entire NIIRS filter is hidden.
You make the following changes:
-
Change the Acquisition Date range (applies to online and archive imagery)
-
Add a Cloud Cover filter (applies to online and archive imagery)
When you switch back to view the online imagery catalog, the Imagery panel is filtered using the NIIRS filter from before. It also uses the new Cloud Cover filter and Acquisition Date range.
Online-only filters persist if you apply new filters, or if you apply filters to a different catalog (e.g., archive). However, online-only filters are cleared if you select Reset, which clears all filters.
-
-
When you unlock the Imagery panel, all filters are removed.
-
Sortable and filterable metadata fields are different when you are viewing archive imagery than when you are viewing online imagery. For more information, see Sortable and Filterable Metadata Fields.
|
|
Filters off |
Unlocked |
|
|
Filters off |
Locked |
|
|
Filters on |
Unlocked |
|
|
Filters on |
Locked |