Importing Projects
If you have already defined an area using a shapefile, KML, GeoJSON, or WKT, import it into Hub to use as a project area.
-
Select Projects. The Projects panel opens.
-
Select Add Project. The Projects toolbar displays at the top of the viewport.

-
Do one of the following, depending on the type of project area you want to import.
 Import a Shapefile, KML, or GeoJSON
Create an area of interest for a project using an uploaded shapefile, KML, or GeoJSON.
-
Select Import.
-
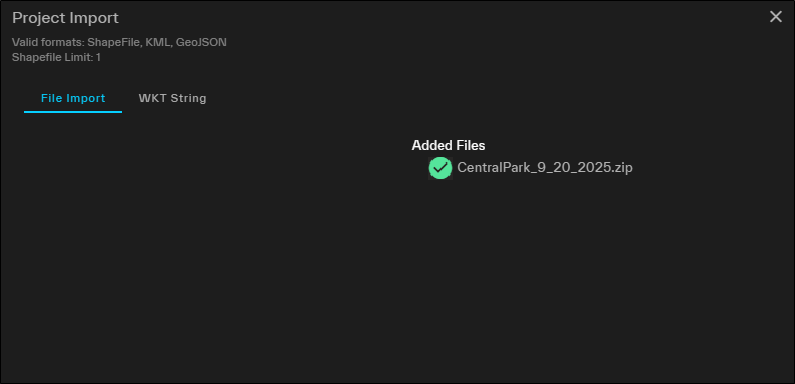
In the dialog, select File Import.
-
To select the file you want to import, do one of the following:
-
Drag and drop a file from your computer into the dotted area.
-
Select Select from Computer. In the dialog that opens, locate the file you want to import, then select Open.
Supported file types:
-
Shapefile (must be zipped with .dbf, .prj, .shp, and .shx files)
-
KML
-
GeoJSON
Upload is limited to one zipped shapefile at a time.
Geodatabases (.gdb) are not supported.
The file uploads.
-
Added areas are indicated by a green check
 .
.Imported areas are auto-named in two ways:
-
"Name" Field If the file you uploaded contains a "name" field, the system uses the specified name(s) from the file to name each area.
-
Unique ID By default, the system assigns a unique ID to each area (e.g., filename + 1, 2, 3, etc.).
-
-
Unaccepted areas/files are indicated by a red triangle
 .
.
-
-
Select Continue. The Save Project As dialog opens.
Import a WKT String
Create an area of interest
-
Select Import.
-
In the dialog, select WKT String.
-
In the WKT Polygon text box, type or paste a well-known text string.
A preview of the
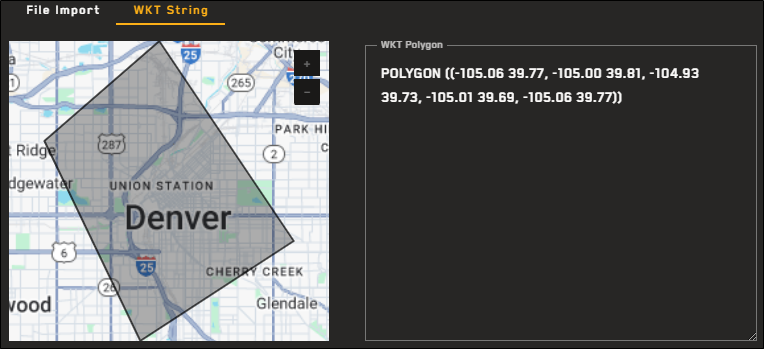
A preview of an area
POLYGON ((-105.06 39.77, -105.00 39.81, -104.93 39.73, -105.01 39.69, -105.06 39.77))
If your WKT is invalid, you will receive an error.
-
Select Continue.
To reset the Project Import dialog, select Reset.
-
-
In the Save Project As dialog, enter parameters and set filters for your project.
-
Project Name Enter a name for your project.
-
Private If you want the project to be visible only to you, select the checkbox.
-
Filters Select the checkboxes next to the imagery filters you want to apply.
-
Acquisition Date Filter Enter the start and end acquisition dates, or use the calendar picker to select the start and end dates.
-
Cloud Cover Filter (0% – 99%) Use the slider to set the maximum cloud cover percentage.
-
Off Nadir Angle (0° – 60°) Use the double-ended slider to set the allowable range for the angle of the satellite in relation to its target.
-
Your imported project is added to the Projects panel. The project opens in the expanded Projects interface (see Overview: Expanded Projects Interface), and the viewport zooms to the extent of the project AOI.
-
More About Importing Projects
-
When importing an area for a project, only a single contiguous feature is supported. If your area has more than one feature, only the first feature will be used.
-
Rename your project in the expanded Projects interface. See Overview: Expanded Projects Interface.