Adding Projects
Add a new project by drawing an area of interest over the location where you want to create your project.
You can also import areas for a project using a file import or WKT. For more information about importing areas for a project, see Importing Projects.
-
Select Projects. The Projects panel opens.
-
Select Add Project. The Projects toolbar displays at the top of the viewport.

-
Do one of the following, depending on the type of project area you want to draw.
 Draw an Area Using the Viewport
Draw an area of interest using the viewport.
-
Select Use Viewport. The viewport is highlighted.
Draw an Area Using an Existing Area of Interest
Draw an area for a project using an existing area of interest. See Areas.
-
Select Existing Area, then select any existing area of interest. The viewport zooms to the extent of the AOI.
Draw an Area Using a Polygon
Draw an area of interest using a polygon.
-
Select Draw a Polygon. The cursor changes to an arrow with a trailing blue dot
 to indicate that the drawing tool is active.
 -
On the map, select a starting point, then select at least two additional vertices.
As you draw the polygon, a callout indicates the length of each segment.
After you have selected at least three vertices, a callout indicates the potential area of the polygon if you were to close it.
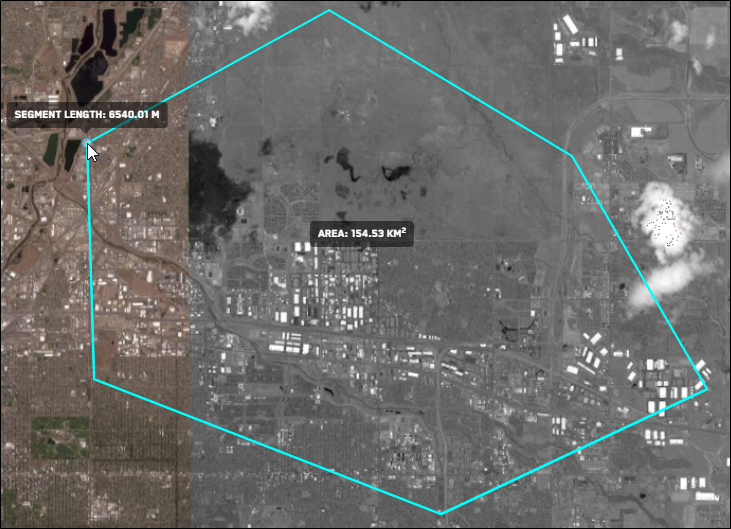
Current area of the polygon.
-
To close the polygon, do one of the following:
-
Manually Close the Polygon Manually connect your last vertex to the starting point, closing the polygon. When your cursor is close to the starting point, Hub will snap the cursor to the starting point so there are no gaps in the polygon.
-
Automatically Close the Polygon Double-click anywhere on the map to automatically draw a straight line to the starting point, closing the polygon.
-
Draw an Area Using a Rectangle
Draw an area of interest using a rectangle.
-
Select Draw a Rectangle. The cursor changes to an arrow with a trailing blue dot
to indicate that the drawing tool is active. -
On the map, select a starting point, then drag to draw
A callout indicates the rectangle's area as you drag.
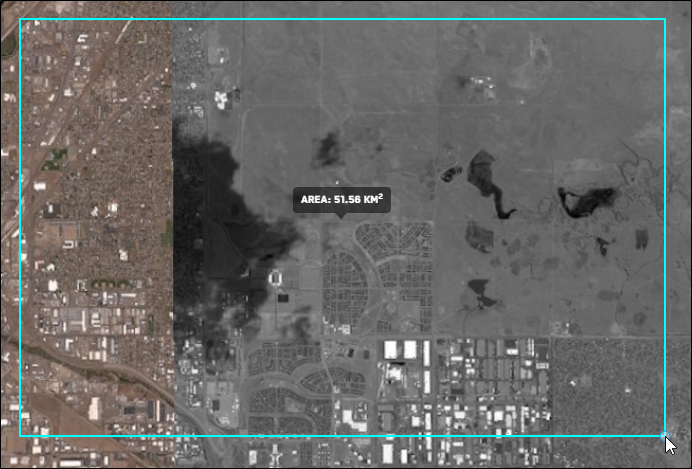
Current area of the rectangle.
-
(Optional) If you want to edit the area, select Edit Area. When you are finished editing the area, select Finish Editing Area. See Editing Areas.
Draw an Area Using a Pre-Defined Area Template
You can also draw areas using a small, medium, or large area as a template. You can then edit the area as if you had drawn it yourself.
-
-
50 SQKM Area A small area, measuring approximately 7.07 sq km by 7.07 sq km.
-
100 SQKM Area A medium area, measuring 10 sq km by 10 sq km.
-
144 SQKM Area A large area, measuring 12 sq km by 12 sq km.
The templated area displays on the map, and the Edit interface automatically opens.
-
-
(Optional) If you want to edit the area, select Edit Area. When you are finished editing the area, select Finish Editing Area. See Editing Areas.
Draw an Area by Selecting 1° Cells
You can also draw areas using a coordinate grid by selecting up to 10 contiguous 1-degree cells.
-
Zoom to level 7 or higher.
-
Select Select Cells. A 1° coordinate grid displays in the viewport.
-
In the viewport, select up to 10 contiguous cells to form your area.
Single-click any cell to remove it from the selection.

Selected cells.
-
When you are finished selecting cells, select Finish.
Be sure you are satisfied with your cell selections before you finalize your area, as they cannot be changed after the area is finalized.
Areas drawn using 1° cells are treated like a polygon after they are finalized. You can edit the area's overall shape, size, and location using the Edit interface. See Editing Areas.
Draw an Area Using a 2.5 km Radius Circle
You can also draw areas using 2.5 km radius circle.
-
Select 2.5 KM Radius Circle.
The templated circle displays on the map, and the Edit interface automatically opens.
-
(Optional) If you want to edit the area, select Edit Area. When you are finished editing the area, select Finish Editing Area. See Editing Areas.
-
-
On the Projects toolbar, select Continue. The Save Project As dialog opens.
-
In the Save Project As dialog, enter parameters and set filters for your project.
-
Project Name Enter a name for your project.
-
Private If you want the project to be visible only to you, select the checkbox.
-
Filters Select the checkboxes next to the imagery filters you want to apply.
-
Acquisition Date Filter Enter the start and end acquisition dates, or use the calendar picker to select the start and end dates.
-
Cloud Cover Filter (0% – 99%) Use the slider to set the maximum cloud cover percentage.
-
Off Nadir Angle (0° – 60°) Use the double-ended slider to set the allowable range for the angle of the satellite in relation to its target.
-
Your new project is added to the Projects panel. The project opens in the expanded Projects interface (see Overview: Expanded Projects Interface), and the viewport zooms to the extent of the project AOI.
-
More About Adding Projects
-
Projects cannot be greater than 124,000 sq km.
-
Rename your project in the expanded Projects interface. See Overview: Expanded Projects Interface.